
I recently decided to replace the electrolytic capacitors in the power supply of my original PlayStation. This is preventative maintenance because over time the fluid from the capacitors can leak out and cause corrosion to solder pads and traces on PCBs. My Life in Gaming’s “Analog Frontiers Part 2” video details of the risk and challenges around keeping older hardware from destroying itself.
Where is a good place to find capacitors? Amazon, eBay, Mouser, Digikey, and Newark are all common places to purchase electronic components. But Console5.com has made a name for itself by selling complete capacitor kits for hundreds of consoles, computers, arcade boards, and more. They have become the first place to stop when looking for capacitors for older consoles.
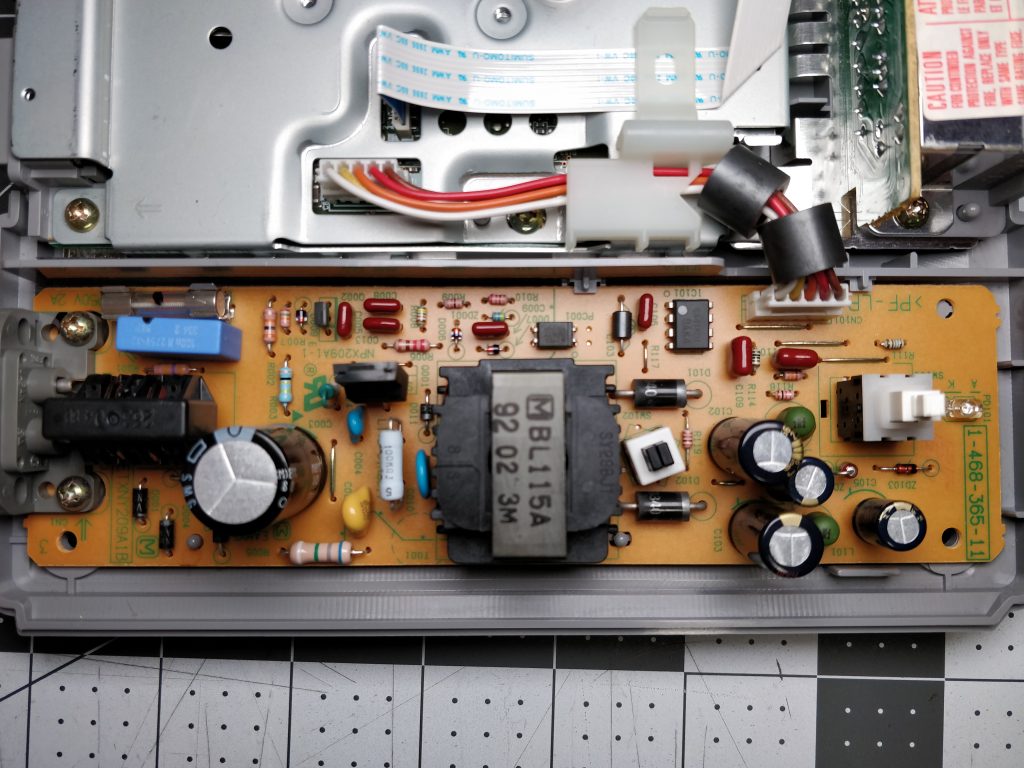
In my case, I needed a kit for a ETXNY209A1B power supply from an SCPH-7501 model PlayStation. This PSU had the following electrolytic capacitors:
| Identification | Capacitance | Voltage |
| C003 | 120 μF | 200V |
| C102 | 560 μF | 25V |
| C103 | 560 μF | 25V |
| C104 | 220 μF | 25V |
| C105 | 220 μF | 25V |
Console5 did not have a specific kit for my power supply, but the detailed information in their wiki allowed me to find a kit that would work. The ETXNY169A1B PSU kit had the same capacitors plus an extra 1 μF capacitor my PSU did not need. With capacitors in hand, the next step was to heat the soldering iron and remove the old caps. More on that later.
Have Fun.
-Tony
Board 
1-468-365-11 
ETXNY209A1B 
C003 
C102 
C103 
C104 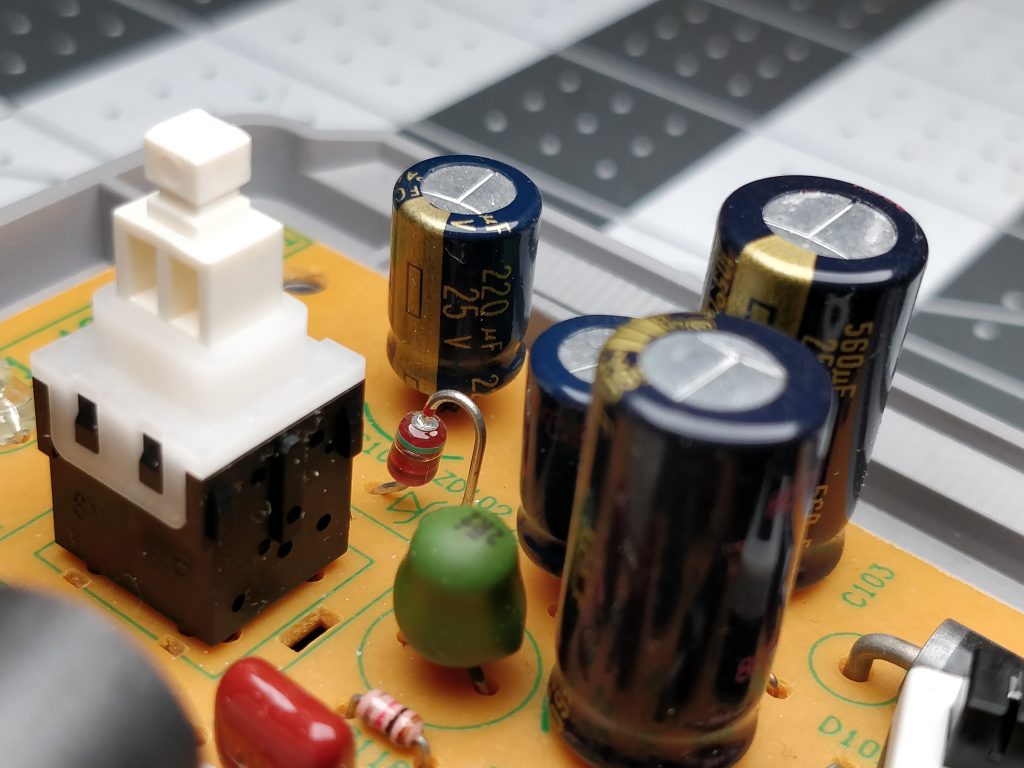
C105


